
Starting a new Picking List Template
To get started, navigate to your Shiptheory dashboard, and from there, click on Settings and then click on Picking Lists.
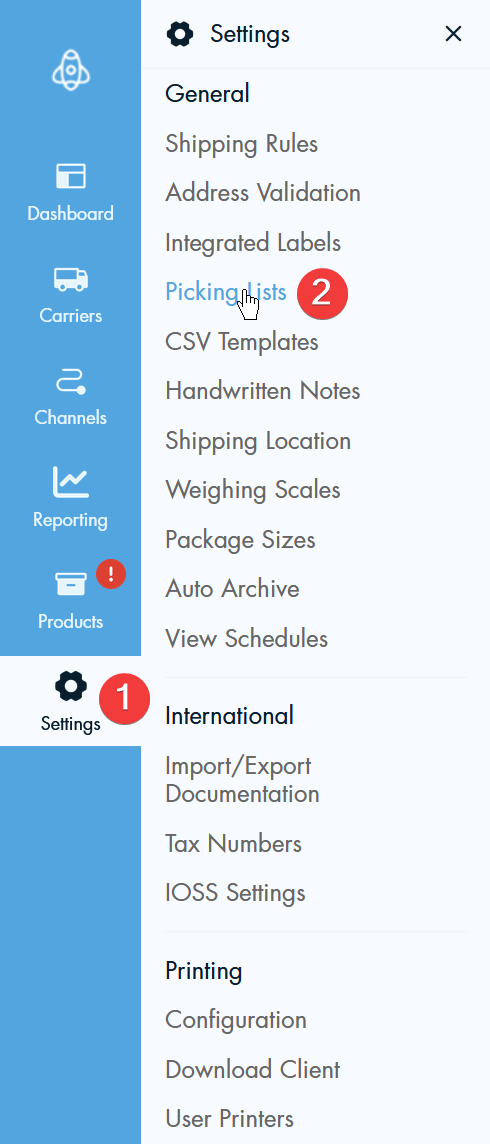
This will redirect you to the Picking Lists setup page. From there, simply click on Add New Template, to add a new Picking List template to your Shiptheory account.
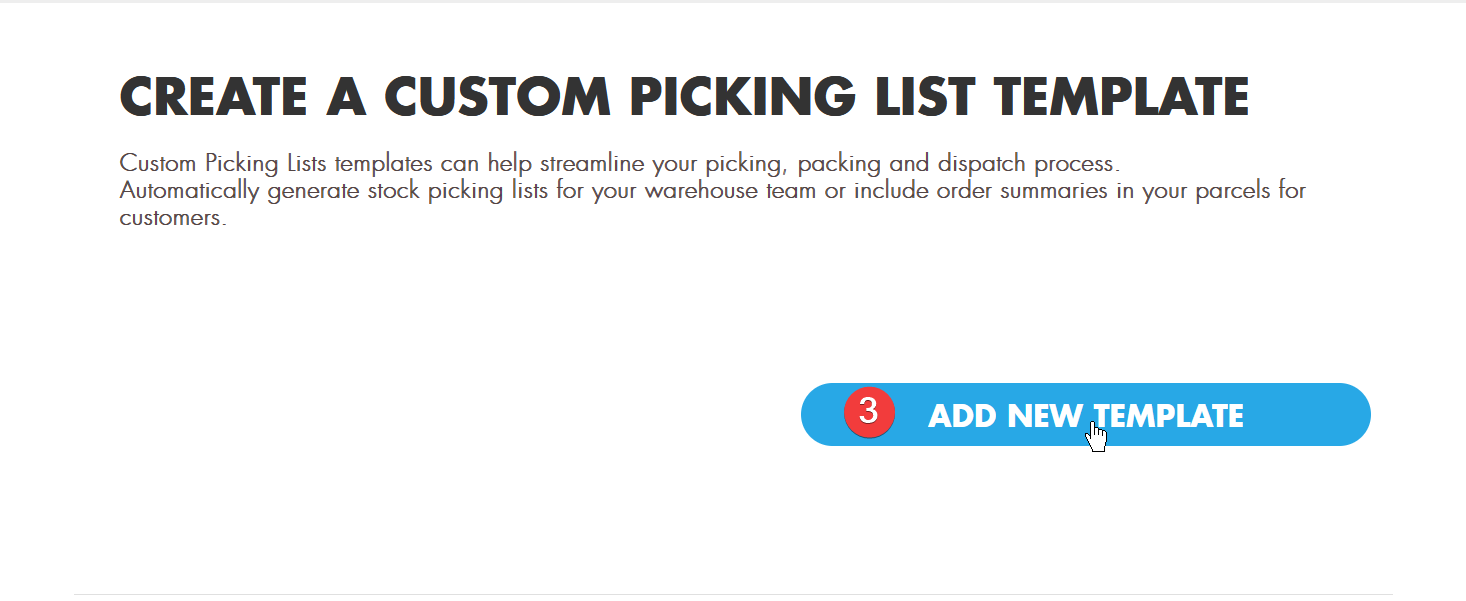
When you have clicked Add a New Template, this will redirect you to a page allowing you to configure your Picking List Details.
Firstly, you will want to select the couriers / sales channels that you want to use your Picking List with, such as DPD and Brightpearl.
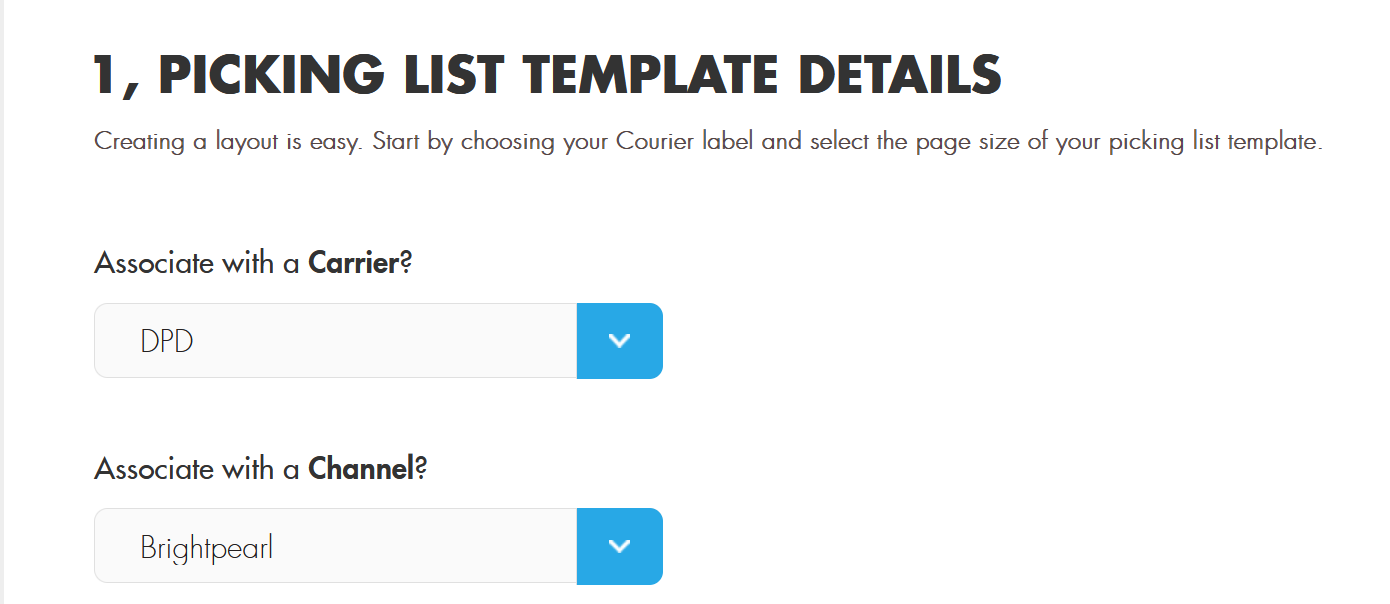
Secondly, you will want to choose when the Picking Lists should be printed, you can print them Manually, or alternatively, you can print them Automatically, with your Shipping Labels or to a printer of your choice.
Once you have specified the printing settings for your Picking List, you will need to specify the page size for your Picking List. You can either, use a page size that is listed from within the drop-down, or you can specify your own custom sizes. In this example, we will use A4.
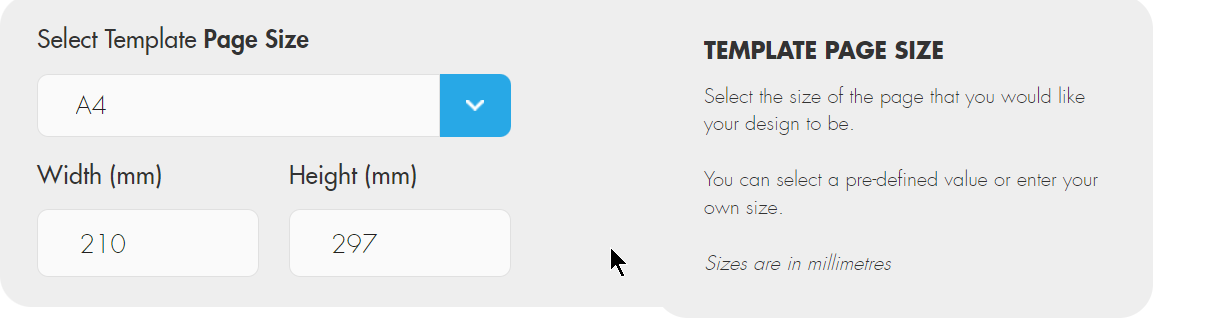
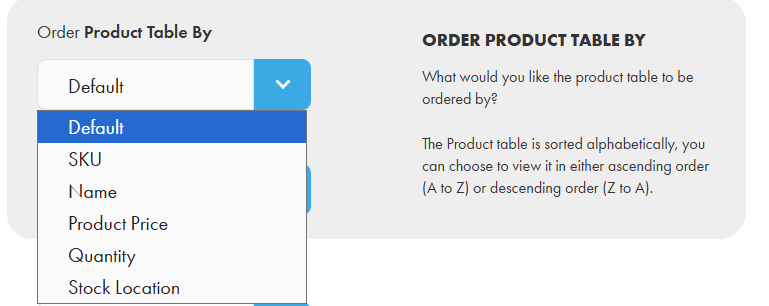
Picking list Order product table
You can order the product table in the Picking List template by going to Advanced Settings. There, you'll find multiple sorting options, as shown in the screenshot below. Once you've selected your preferred option, you can sort the products in either ascending or descending order.
Note: If 2 products in the product table have the same value, there is no order for them; the products can appear in either order; as it's random.
Once this is done, the fundamentals for your Picking List have been completed, the next step is to design your Picking List.